Saturday, August 30, 2014

Battery System

The off-the-grid movement has done much to educate us on how to set up battery systems for powering homes.  If you're interested in digging into the details, visit Building a Battery Bank for Your Off-Grid Energy Needs.  I would also recommend you look at Battery Basics: A Layman's Guide to Batteries and the discussion below on selecting the type of batteries will make more sense. Its an interesting topic, and I definitely made a few mistakes along the way.

Using my shorthand way of calculating amp usage and 12V Battery needs in the Dreaming About Amps post, my rough estimate of daily energy needs first looked at the 120V appliances.  I estimated 10 amps for HVAC, and 5 amps for cooking and hot water heating.  Converting that means 15 - 120V amps x 12X conversion rate is 180 - 12V battery amps needed.

I also have 12V DC needs of 25 Amps for the refrigerator and some interior lighting.  Add this to the above and I need 205 12V battery amp-hours daily.

There's another battery consideration to account for.  In the Battery Basics link above they talk about deep cycle batteries.  Deep cycle batteries can't stand discharging clear down to zero on a regular basis.  Batteries are an electro-chemical process so they degrade a bit each charge / discharge cycle, and their effectiveness degrades as they discharge closer to zero.  Deep cycle batteries stressed to their limits will last a few months, and batteries regularly discharged to only 50% of capacity will last years.  So its best to size your system for a 50% average discharge, which means whatever total battery calculation you arrive at, you double it.

Doubling our estimated amp-hour needs makes my daily battery storage needs 410 Amps.

Selecting Batteries

I am mounting my batteries inside my trailer in some unused nooks and crannies, because of weight distribution, keeping them and the inverter out of the weather, and to make wiring easier.  You commonly see wet cell batteries in off-grid applications and they have very good price performance characteristics.  But wet cell batteries give off noxious fumes when charging and  if enclosed or inside, they have to be vented - not good for my application.  So I went with an absorptive glass mat (AGM) Sealed Battery.

I am using two 12v 200ah solar power batteries that are 4D Size which is 20.5" x 14" x  12".


These are 150lb each which is why I wanted them sitting closer to the center of gravity of the trailer. They are mounted out of the way in NOCO heavy duty battery boxes.


Wednesday, August 27, 2014

Water Heating

Having at least SOME hot water is a key component of making your RV more like home.  Many of today's RV's have dual propane / electric capability, but I don't have propane and I don't want to heat 5 gallons of water at a time so I'm looking for other options.  In my vision of the all-electric RV of the future, tankless water heating is the way to go.  While I will theoretically have enough wattage for a small tankless unit, I haven't found anything that looks like a good fit for an RV.

I considered the Ecosmart Point of Use Electric Tankless Water Heater and its on the edge of what I could theoretically do for wattage, but still way more than I really need.   While I'm looking for something smaller, a reasonable option could be the Bosch 2-1/2-Gallon Point-of-Use Indoor Electric Water Heater.  I like that it only uses 1500 Watts and 2.5 gallons at a time is better than 5, but I'd still rather find a good tankless option.

In the meantime, my hot water heater is (don't laugh!) one of these kitchen hot water kettles.  They are all we need for dishes and a "spit bath".

Refrigerator

I don't need a lot of refrigerator space for the GearBox, and I want it to be efficient and always on - just like your fridge at home.  Many cargo trailer conversions you see will install those small 12V / 120V units that look like the ones in your dorm or motel room.  They're cheap, seem to work decently on 12V, but they aren't that reliable, not well insulated, and seem to run ALL the time and kick out a lot of heat which is not good for long term battery power conservation.  

I wanted to do better than that and I chose the Whynter 62-Quart Dual Zone Portable Refrigerator/Freezer.


Amazon had the best price I found anywhere and this unit is super insulated, portable, and has an Eco-Mode that I think will get me to under 2 Amps / hour avg.  I'll cover the wiring and interior placement in a future post, and I will do some testing to see if my guess on the power is correct.

Air Conditioning and Heating

For me, air conditioning is essential.  For many months of the camping season, its hot enough during the day and trailers absorb enough heat that you can't be comfortable and get to sleep at night without it.  Another thing I do is when driving long distances, I want to drive well into the evening until I'm tired and then pull over to sleep at a rest stop or similar area.  If its hot I want to be able to run my A/C on battery to cool it down for sleeping.

For heating, I'm a minimalist.  We are 3 season campers and we never run heat during the night.  We use good sleeping bags and comforters to sleep warm and only use the heater in the morning to take the chill off.  After we're up and around, our body heat and breakfast cooking keep the trailer warm until we're dressed and outside for another day of exploring and hiking.

A/C vs. Heat Pumps

Roof mount A/C's are ubiquitous in the RV and Cargo Trailer industry.  These are very durable, move a lot of air, and the roof mount is convenient.  But most of them are old technology and aren't particularly energy efficient.  The smallest of these are around 12,000 BTU and use 17-18 amps per hour to run, and they are overkill for a trailer my size.  They are fine when plugged into the RV park, but not for battery operation.

Our theme is the All-Electric RV of the future, and I'm convinced that heat pumps are the wave of the future.  Heat pumps are common in residential and small commercial buildings, but rare on an RV.  A heat pump moves thermal energy by absorbing heat from a cold space and releasing it to a warmer one.  They use a compressor and the refrigeration cycle similar to an A/C, but they can also reverse the cycle and pump heat into the trailer.  For my application, the heat pump would supply mostly A/C since I'm a minimalist on heating, but would serve as the occasional heater when needed.

The problem is that standard heat pumps you see for a residential application are too big, too unwieldy for an RV.  I've seen a Duo Therm Cool Cat heat pump advertised on some smaller trailers but I'll be darned if I can find one anywhere or get any specs on it.  And I think they require mounting through a big hole cut in your trailer, kind of like a window air conditioner looks.

But there's another option that I first saw when traveling in foreign countries - the Ductless Mini-Split Heat Pump. The beauty of these is no ductwork.  The "split" means the outdoor compressor/condenser is separate (split) from the indoor air-handling unit.  The only hole in your building is a conduit for the power cable, refrigerant tubing, and condensate drain.   Comparing a 12,000 BTU mini-split unit to our 12,000 BTU roof mount RV A/C, it uses 7-8 Amps or half the Amps.  While smaller than the typical household heat pump, they're still a bit boxy and not as convenient to mount as the rooftop models, but I'm going to get around that by mounting the compressor on the tongue and route the hoses into the trailer through a 3" hole and mount the interior blower up high on a wall.   I'll also cover the outside unit with either a canvas cover when driving or build a metal and wire mesh cover keep the rocks off the unit.

"Inverter" Mini-Splits

The smallest standard mini splits I looked at were 9,000 BTU which is still more than you need for a trailer my size, but are already twice as efficient as the rooftop A/C units.  Most models are rated at a 7-8 Amp draw and have a SEER Rating of ~13.  The  higher the SEER rating the more efficient the unit.  You can find these online for around $700 which is very price competitive with a roof mount RV A/C.

While the standard mini-split is already an improvement, there are more expensive "DC Inverter" models with a SEER rating as high as 23.  They cost about a third more but are 50+ % more efficient, and instead of stopping and starting periodically to maintain a temperature, they use a more sophisticated system that continuously adjusts the compressor output as needed.  These are rated at 5 Amps max, but should dial themselves down to as low as a 2 Amp draw while maintaining a constant temperature.  Since we're looking at every Amp, my bet is that I can cut my battery needs by one third again over the standard mini-split models and you can easily spend more than the $400 difference on one more large deep-cycle battery.  I'd rather spend $1000, save on batteries and weight, and still be price competitive with roof-mount A/C's.

I don't know how Amazon does it, but they seem to have everything and as a Prime member you get free shipping so I purchased a Pioneer Ductless Mini Split INVERTER Heat Pump, 9000 BTU (3/4 Ton), 21.5 SEER 120 VAC unit.  I'll cover installation in future posts and I look forward to doing some serious testing to see how efficient this unit is and I'll post results of actual Amp draw under different conditions. 

Dreaming About Amps

One of my favorite movies is Apollo 13, and there's a scene where engineers in a room are thinking about the problem of trying to get the astronauts home.  These engineers are all arguing their positions until one of them comes up with the one, searing insight - "power is everything!  Without power, they can't re-enter the atmosphere and they don't get home, period!"  From that point on they totally re-think the problem and they turn their focus to squeezing every possible Amp out of their spacecraft to successfully get the astronauts back to earth.

To build a battery powered, all-electric RV, you have to re-think everything about how conventional RV appliances and power systems have been done.  For example, I'll show below why conventional roof-top RV A/C systems are hopelessly inefficient for a battery powered application.  Fortunately, the off-grid living movement has made tremendous strides in recent years and can teach us much about how to successfully change from the old propane / 12V / plug-in paradigm to an all-electric battery system.

First lets look at a shorthand way to think about our power consumption and battery needs.  If I replace the RV propane cooktop with an electric cooktop like this DUXTOP 1800-Watt Portable Induction Cooktop, it is rated for 1800 watts max power usage in one hour.  We don't cook on highest heat all the time, and for probably 15 or so minutes at a time.  So lets say we use 900W for 30 minutes of cooking a day.  900 Watts / 120V = 7.5 AMPs for an hour, 3.75 AMPS for 30 mins.

Now we need a shorthand way to convert 12V DC battery power into 120V A/C.  I'll cover inverters and batteries in another post, but for now assume it will take roughly 12 -12V DC amps to equal 1 - 120V AC amp.  Our shorthand is a 12X conversion rate for 12V DC amps from a battery to equal 1 - 120 V AC amp for our appliances.

Our simplified calculation of power needs for this cooktop is 4 - 120V amps X 12 battery amps = 48 amp / hours of battery storage to cook 2 meals a day. That's easily doable with normal deep-cycle batteries and inverters and we can use this shorthand to figure the battery needs for all our appliances.

To see why we have to re-think conventional RV systems though, lets look at A/C - easily the biggest energy draw for the GearBox.  The smaller conventional rooftop RV units use 17 - 120V amps per hour max.  When you're plugged in a 30 amp service at your RV Park, these rooftop units work great.  But we don't want to plug in all the time, and 17 120V Amps X 12 battery amps would mean that running the A/C for one hour would use up 200ah of batteries!   A bunch of heavy, expensive batteries and a big-ass inverter are not what I have in mind for the GearBox, so I've got some ideas how I can reduce that 17 amps to less than 5, which should allow a few hours worth of A/C on one day's battery charge with a reasonable sized battery system and inverter.

Tuesday, August 26, 2014

Finishing the Interior

I ordered my trailer with insulation, linoleum flooring, and ceiling already installed so the next two items on my agenda were to fix up the interior walls and to start installing the sink and cabinets.  I wanted to use ready-made stuff as much as possible and I found what I wanted at my local Home Depot.

I chose to cover the plywood that comes with the trailer with nice birch paneling.  I figured this was easier than painting or otherwise sealing the plywood and certainly looks nicer.

My sink arrangement is Home Depot's Hickory base cabinet, sink cabinet, and wall cabinet.  The cabinets are pre-assembled, cheap, and finished.  All you need to do is put your Formica countertop on and cut in your sink.  I will be installing a water pump and small water tanks inside the cabinets which will cover in another post.


The GearBox Arrives

The first thing you need is a knowledgeable, honest dealer that you can work with.  I am happy I found Bruce at Signature Sales in Loveland, Co.  The second thing you need is to buy a quality trailer - there's not much price difference between the cheaply made ones and good ones, so don't skimp.  I chose RC Trailers which is actually the old "Royal Cargo" brand which has been around for years.

With a good idea what I wanted to end up with, and someone like Bruce to talk through the options and get things special ordered correctly from the manufacturer, I placed my order with the following specs:


  • 2014 RC 7' x 12' Enclosed Trailer
  • 6" extra height
  • RV door latch
  • 3,500lb Torsion Down Start Axle (with Brakes)
  • White Ceiling Liner
  • Insulate Ceiling
  • Insulate Walls
  • Insulate Floor
  • 24" x 30" Egress Window
  • Gray Marble Flooring
  • Aluminum Wheels / radial tires
  • Led Backup Lights
  • 2 Tone Pewter Front / Charcoal Rear
  • jack stands at rear
  • aluminum corner flashing
  • diamond plate front guard
About 6 weeks later, voila!  It arrives:


The Trailer

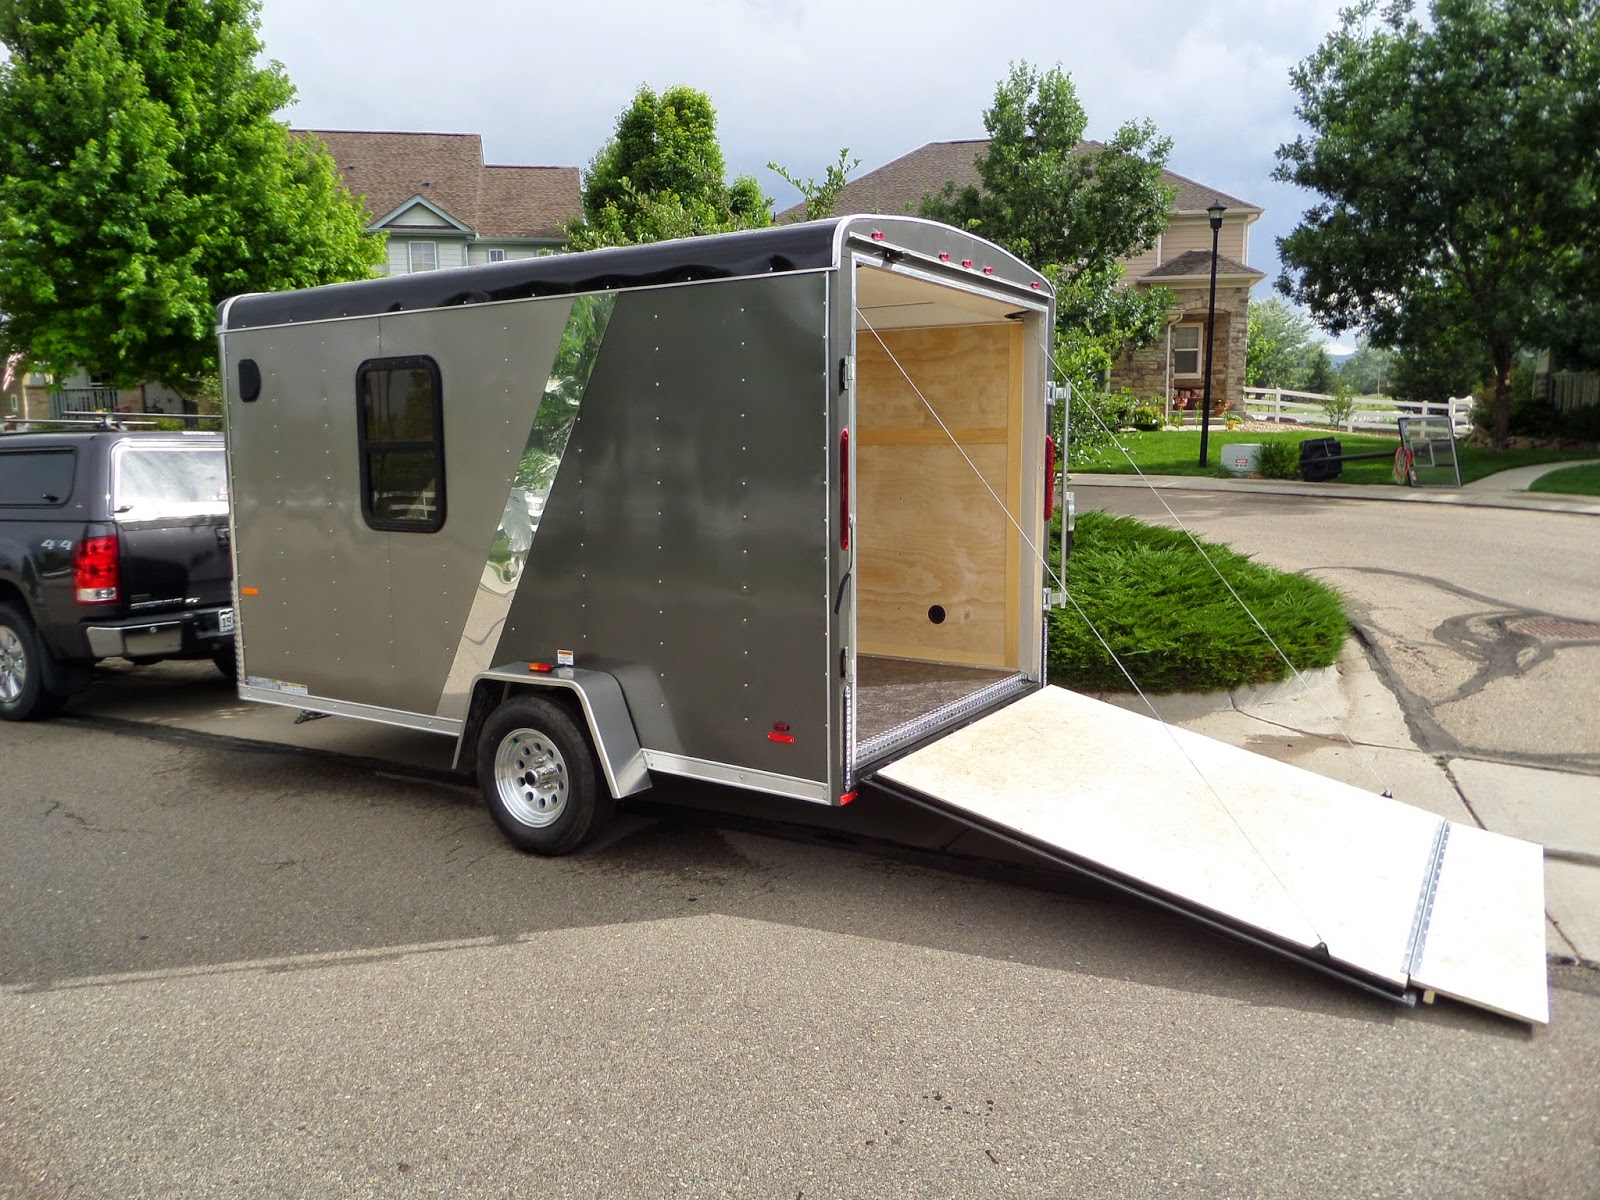
The basis for the GearBox is the common cargo trailer that you see contractors and landscapers use every day.  The common sizes are 6 - 7 feet wide by 10-16 feet long and look something like this one:


I had a blast playing with the layout and features of my trailer (more on that in a later post), and like the proverbial kid in a candy store, I kept adding things and my trailer size grew accordingly.  I finally came to my senses and re-visited my original specifications (About) and dialed my design back until I settled on  a 7'x 12' single axle trailer.  I also considered several options and I'll walk you through the what and why of my choices which ultimately led me to special ordering my trailer from the manufacturer.

Interior Height

Stock trailers come in the 6' tall range although you will occasionally see a "tall model" on a lot that is 6" taller.  Most manufacturers will build custom versions in 6" height increments up to 2 feet taller (They'll also custom build shorter ones). I'm a tall guy so I needed to order mine about 6'8 " tall.

Single vs. Dual Axles

Axles come in weight ranges from 2900 lb to 5200lb, single or tandems, and leaf or torsion springs. Tandems give you much more carrying capacity and tow somewhat easier (less wandering), but also adds 300 or so lbs. and $300 or so cost, and lessens the turning radius and overall mobility in tight places.  For my intended use, I won't be exceeding 3500 GVW so I don't need tandems.

Torsion vs. Leaf Axles

There's also a torsion axle option which is usually a ~$300 upgrade.  They're supposed to have a better ride and require less greasing and maintenance, but honestly, I've towed many trailers and I can't tell the difference.  I've heard that torsions really shine on larger, heavier trailers, and that might be true, but I don't think towing or ride is a reason to go to the extra expense of a torsion axle for the GearBox.  But I did find another reason you might consider it which I'll cover under Ground Clearance below.

V-Nose or Not

The typical cargo trailer is a box, but you're starting to see more with V-noses on them that add 24"-36" of additional v-shape floor space for around $300 extra.  A V-nose does give some more inside liveability and it just “feels” larger.  But it does take out the room on the tongue and they can be more difficult to back-up.  The extra space is nice for moving around in the trailer, but in my opinion its not worth it to try to mount cabinets or add any fixtures in that odd shaped area.  

You'll often see claims that they cut the wind better and give you better gas mileage, but I think that's been pretty well debunked by some smart people.  The tow vehicle cuts the wind and creates a negative air pressure area behind it so the V-shape has minimal impact on wind resistance.

I chose not to go with a V-nose because I didn't feel the extra cost for the space was worth it, and I wanted to keep the tongue free for my HVAC unit.

Ground Clearance

I want a little more ground clearance than stock for some light off road ability, and its relatively straightforward to do this with a lift kit.  Most manufacturers have an option to add a lift for around $200, and Dexter has kits for their own axles that you can install yourself.  These basically raise the deck of the trailer which helps alot, but on a standard axle, you still have that straight axle tube between the wheels and this doesn't help that clearance a bit.

Looking closer at torsion axles, they're basically a rubber band mounted crosswise on the trailer frame and the axles are arms on each end of the band that pivot up and down.  The torsion bars are mounted up on the frame of the trailer so you don't have that axle tube to catch on rocks.  Some improvement in axle clearance, but no improvement in deck height and probably not worth the $300 or so by itself.

I then learned that the torsion arms can be special ordered with a "downstart", meaning they are angled down instead of level, which raises the profile of the trailer (or you can do the opposite to lower your trailer profile).  This puts the trailer deck up 2 inches or so.

When you add this 2-3" more of ground clearance to go with the additional clearance you get by eliminating the axle tube, I was interested.  If I special ordered it, it was only $150 more than the $200 leaf spring lift kit so I went with torsion axles with a 22.5 degree downstart.

Aluminum vs. Steel Frame

Standard cargo trailer construction is steel frame, with aluminum skin.  An all-aluminum trailer is really nice - they're lighter, and seem to be better built because they're a "premium" product.  And they will never rust!  The larger the trailer, the more the weight savings matter, but for my size of trailer, it seems like aluminum is only about 250 lbs. lighter and at least $3,000 more expensive. All-Aluminum is really nice, but a conventional trailer meets my weight and GVW requirements so I am sticking with steel.

Insulation

Insulation is absolutely necessary to have a comfortable, energy efficient trailer you can sleep in.  The only question is if you order it that way or if you install it yourself.   Since I'm special ordering my trailer, I looked at what it costs to have it insulated at the factory and its surprisingly reasonable.   In fact, if you have the patience and time to order from the factory, many of the options you'll want to add to a trailer can be installed professionally for not much more than what it will cost you in materials and save you tons of time.  But if you're reasonably handy, its not hard to install the insulation yourself and there's many youtube videos that show you how.  I chose to order mine with factory insulation on the sides, roof and floor.

Windows

I wanted a nice sized, RV style emergency egress window.  Like the insulation, I found that ordering from the factory is very reasonable, and unlike the insulation, installing windows is much harder and involves cutting holes in the trailer, framing in the window, etc. etc.  No thanks.  I ordered mine from the factory, and they were very accommodating to where I wanted it located.  If you are installing one in an existing trailer, you might want to have a mobile RV repair company to do it.  They seem to be everywhere and unless you're pretty good at this kind of work, I'd recommend paying someone to do it right.  

Rear Doors

This is more personal preference.  Barn style doors are easier to open in tight places and would be fine for most of the kind of gear I'm hauling.  Ramp doors need space behind you to be able to lower them, and need a spring loaded assist for raising and lowering.  Ramps used to cost more, but lately it seems they're so common there's little difference in price.  I will occasionally be hauling an off-road motorcycle, so I went with a ramp for ease of loading it.

These are the major things that you need to think about before you decide whether to start with a used trailer, a new one off a lot, or a custom order.