Sunday, October 25, 2015

High Output Tow Vehicle Charging System

If you recall, my average estimated draw down of my battery system is 200ah - 50% of the 400ah capacity.  That's actually quite a bit of power and can run my HVAC for several hours.  My tow vehicle is a GMC Sierra 1500 with factory towing package, so it has a decent alternator on it already without going to a special high-output alternator.

The standard 7 Pin towing hookup does have a hot lead for charging an RV battery, but that is really only for keeping a small RV battery charged while driving - not for charging a high output system like this one.  The hot lead on a towing vehicle has a 12AWG wire and a 30 amp fuse.  This just isn't designed to handle the load of the large batteries I have, and the small wire size limits the current and takes too long to charge large batteries.

Another consideration for this setup is isolating the vehicle battery from the trailer batteries so you don't run the vehicle starting battery down while you're using your trailer on battery power.

In researching this topic, I came across the Hellroaring Battery Isolator and Combiner which not only is a great product, but they have some excellent Application Notes that explain how to design your charging system as well as excellent Technical Support to help you.  You can isolate your battery with a cheaper relay that are often used for cars with high output stereos or trucks with winches, but I would highly recommend spending the extra $ for a higher quality solid state system like the Hellroaring. 

 Using this description of the setup and I followed the recommendation from Hellroaring to use 25 feet of 8AWG wire.  The amount of wire highly influences the load on the charging system and I sketched my design and sent it to Hellroaring's technical support, and they were very helpful.  My setup should generate approximately 50 amps per hour which will charge up my 200ah of average daily use of my batteries in 4 hours of driving.    

I used a 60 amp fuse on each end of the positive wire, starting at the vehicle battery, and on the other end where I connect to the battery bank.  The red wire below shows the positive 8 AWG wire and fuse block at the battery:
   

I covered the wires with flexible conduit tubing before routing across the engine compartment and used zip ties liberally to hold the wires in place.  


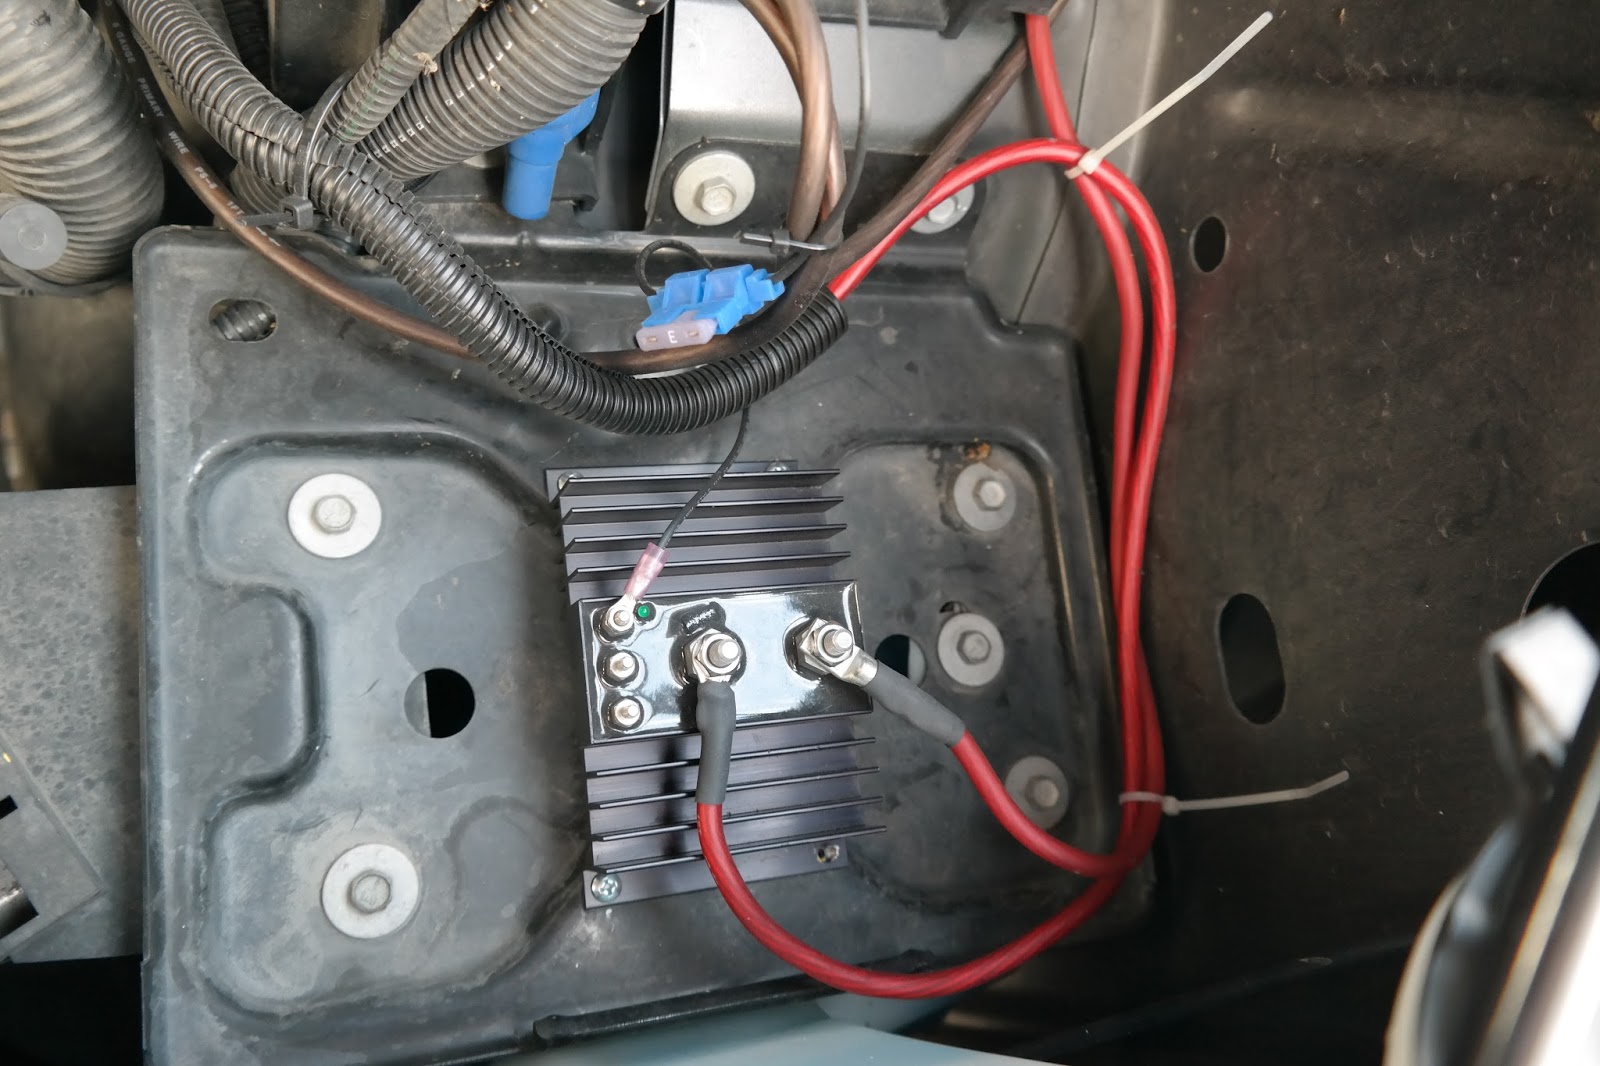
I grounded the negative wire to the large strap that grounds the engine block to the vehicle body in the engine compartment (the yellow connector in the picture below).


I mounted the Hellroaring isolator in the engine compartment (the square block with fins below) and the positive goes into and out of the isolator, and then to the trailer.


Both positive and negative wires were then run along the frame to the rear of the truck and I mounted a standard 12v winch battery quick connect plug on the end.  Here it is below sitting on my rear bumper with the rubber plug cover:


I connected the same type of plug to the trailer batteries mounted on the tongue of the trailer so its a simple job to plug-in and hook up the trailer.  

Friday, October 2, 2015

Zen and the Art of Welding

The real fun of doing a project like this is getting back to using your hands and building stuff.  One of the things I wanted to get back into was welding, which I hadn't done since high school. I needed to weld up a nice bracket for mounting my HVAC and electrical system on the tongue of the trailer.  I hadn't realized how much welding technology has changed in recent years and there's no reason that you can't be welding your own projects yourself quickly and inexpensively.  

You can learn everything you need to know from Youtube.  I am amazed every day what is on Youtube, and short of brain surgery, you can learn anything.  The best welding information site IMHO is "Welding Tips and Tricks".  Jody Collier is a professional welder and he deserves some kind of award for putting out a very good video every week for 10 years or so.  He covers all types of welding and even educates you on metallurgy from a layman's perspective.  Another site I like with more of a "this is how you fabricate stuff" approach is ChuckE2009.

Look on Craigslist for a used MIG welder for $300-$500.  Do yourself a favor and get a name brand like Lincoln, Miller, or Hobart. You can do everything you need to with a 140 amp MIG welder that can plug into your 115 V household current.

Here's my setup I used to build the tongue mounted frame.  The Millermatic 211 MVP is a beautiful welder - highly recommended.  Warning though - after you use a really high quality welder like a Miller or Lincoln, you won't be able to tolerate the cheap junk ones.  


Building the tongue mount frame for HVAC and electrical

I first had to weld some risers to clear the electric brake box and other wiring on the tongue.  On the bottom of the risers is 2" plate pieces for U-Bolts which will hold the whole assembly down on the tongue.


Here is the welded box assembly which was then welded to the risers.


The completed tongue assembly


Turned over for painting.


The HVAC compressor mounted.


Ready to install on the tongue!

Mounting the HVAC and electrical system on the tongue

After welding and painting the frame for the tongue, I mounted the HVAC unit. 


Then set it on the tongue.


Then added the batteries (in battery boxes) and the inverter assembly is mounted in the plastic toolbox on top of the frame.


The whole unit is bolted to the tongue with heavy U-bolts.